How It's Made - Clutch
1) Print off image
2) Trace image, then trace again onto clean sheet (pic 1)
3) Cut everything
a) First big mistake - there was supposed to be a section of yellow strings at the bottom that I ditched because I totally botched the cutting.
b) There are a bunch of other sections that I just cut poorly (like the diagonal columns).
4) Weed the black in the grid lines and the mountains in the background
a) While I was doing the transfer I had 2 issues. First, a piece of something got on the vinyl, which I then had to cut out, which led to the black bleed in the vertical orange column. Second, I forgot to trace the circle of the disc on, so placing the disc right was difficult, and I ended up with the image 1/8" too low.
5) Hot dip in idye black (pic 2)
a) I made the decision to not try to cover the lines with glue - I figured I would need the black single cut outline to know where to cut for the second mask. My mistake was then not leaving it in the dip long enough for all the black lines to take. It looked like they had, but many segments did not.
6) First bit of color is actually a light blue, a quick dip in idye blue (pic 3)
7) Then a dip in idye violet for the grid lines (pic 4)
8) Then a dip in idye pink for the other gridlines (pic 5)
a) From here on everything done with the first mask was painted on, this was the end of dip dyes for a while.
9) Started trying to dye some sections that did not touch anything already dyed (pic 6)
10) Here's the first use of glue as a "mask". I wanted to do everything that was the light blue color, but that included outlines of the sections in the head that were already dyed. So I covered those with Elmers and prayed that it would hold (pic 7)
11) Dyed the shapes on the right green over top of the blue outlines and weeded off the sky area. (pic 8)
12) Dyed the sky. Used glue dots for the stars. Started with 2 distinct sections, the top 2/3 as black, and the bottom 1/3 as a mix of red and brown. Then created the transition by applying black with a qtip. (pic 9)
13) Dyed the purple and blue sections in the sky, created the left to right transition to black the same way. (pic 10)
14) Filled in a the diagonal columns, and the vertical orange ones. The 3 lighter vertical ones were done with water mixes applied at room temp like you would do for skin tones. (pic 11)
a) This is where I realized how key the outlines of all the shapes were - they allowed me to get so much more done on the first mask than I would have thought since they acted like barriers between the section to be dyed and the sections already dyed.
15) That was as far as the first mask got me. (pic 12)
16) Remasked and dipped the outline of the head and bunch of the columns/shapes in Flame Scarlet.
a) Flame Scarlet is a Pro Chem color. It is equivalent to a mix of bright red and orange.
17) Weeded the rest of the "background" and dipped in orange (pic 13)
18) Weeded the head and painted on the shadowed triangle with gun metal. (pic 14)
19) Painted on the 3 sections of the head. This was the most fun part, and my favorite section of the whole thing. (pic 15)
20) Unmask
21) Paint in the last few sections.
22) Paint on the shading on the face.
23) Covered the edge of the image with electrical tape/glue to avoid another piece of vinyl.
24) Eye droppered on the dye on the rim.
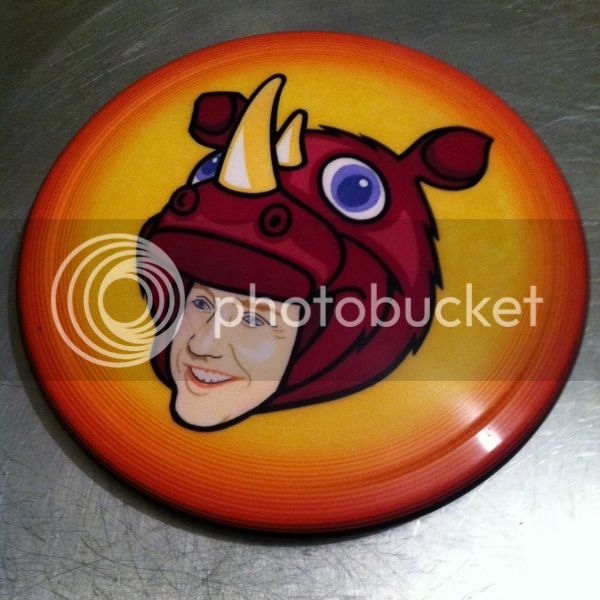
25) Done (pics 16, 17, 18)
Pics 1-3 below