• Discover new ways to elevate your game with the updated DGCourseReview app!
    It's entirely free and enhanced with features shaped by user feedback to ensure your best experience on the course. (App Store or Google Play)

Okthrowberfest: "How It's Made"...

BTW, Odyssey, I caught your post about wanting to buy "Full Moon Feast" in the other thread. If you want, you can send me an offer via PM. Just know that she'd be hard for me to let go. Worst I could do is say "no". :D Also, thanks for all of your kind words about my work. I think you and I have learned a lot (especially about dyes) from each other. Well, at least I've learned from you! Thanks!

Peace,
-Jeff

As much as I love it, I don't deserve it. It's yours. That should be hanging on your wall!

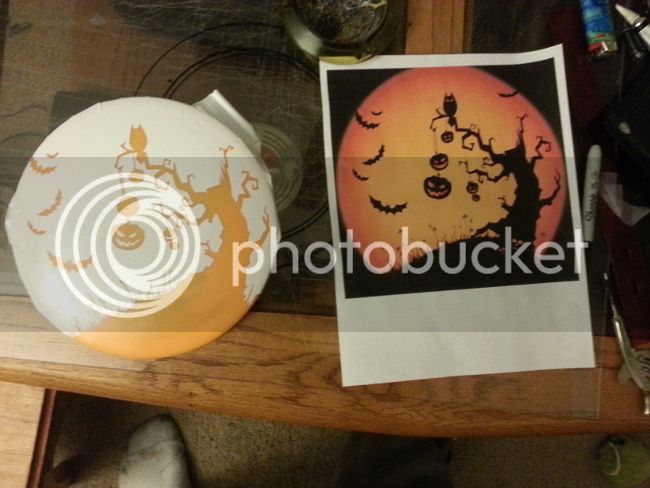
I for sure have learned from you as well. Those pictures of how you laid out your sky in this one really got me thinking for backgrounds. Plus the candle wax and how you do your colors. I really need to practice my technique on planning out some multi-colored ones.

I've been kind of in the mode lately of just doing semi-practical spin/sc/bag/gel combo dyes to retain the stamp...Mostly just making my own discs look pretty. I feel I need to challenge myself more now after seeing all these this year! I don't think I could bring myself to throw something like yours though if I ever pulled one off that cool. :D Great job again!
 
DTP,
Thanks, and thanks for sharing how you did yours! Once again, GREAT WORK! It looks like The Hand That Feeds was done on a Gold Line disc? Can't tell on Lycanus. What discs are they done on?

Peace,
-Jeff

Thanks! You are correct...'Hand' is on a kinda off white GL river. Lycanus is on a white opto river although it is more opaque than the clear opto plastic I'm accustomed to.
 
You guys really blow my mind with your skills and creativity. Thanks for posting this thread.

Sometimes I feel like a complete hack when it comes to dyes. Especially after I see some of the incredible "Flying Art" you guys do.
 
Pretty amazing! Thanks for walking through the process. I didn't realize there were so many steps involved, I'm even more impressed with more complex and multi-colored dies now.
 
I also have a couple of questions for anyone that dyed a glow disc...

What plastic/mold did you use?

More importantly, How did you photograph yours?

Full Moon Feast was done on a Glow Champion Roadrunner, and I tried SO hard to get a good shot of it glowing, but was unsuccessful. :mad:

Would any of you be willing to post how, and with what equipment you took your shots with? I'd appreciate it!

Thanks,
-Jeff

Murder of Crows is on a Glow Champion Leopard. I have a nice Canon and tripod. Set the disc up, and set the exposure for a good few seconds, experiment but exposure is long. I've gone somewhere between 8 and 13 seconds to get good results. Make sure the room is completely dark(closet, bathroom) and keep the camera still.
 
Murder of Crows is on a Glow Champion Leopard. I have a nice Canon and tripod. Set the disc up, and set the exposure for a good few seconds, experiment but exposure is long. I've gone somewhere between 8 and 13 seconds to get good results. Make sure the room is completely dark(closet, bathroom) and keep the camera still.

Thanks Bennett! That's kinda what I figured. The longest exposure I could get with my point and shoot was 2 seconds. Might have to have a friend take some shots.

BTW, did you find that pic?

Peace,
-Jeff
 
That's an amazing job and a very time consuming process.
I have a couple of questions.

After you died the black outline, did you have to remask it to then dye then green skin? Same with the red top. When you went to dye it, did you have to cover everything else up?

How much practice do you have to have cutting by hand to do this?!
 
Thanks for the excellent step-by-step! Cutting that whole thing by hand takes some patience, that's for sure.
 
That's an amazing job and a very time consuming process.
I have a couple of questions.

After you died the black outline, did you have to remask it to then dye then green skin? Same with the red top. When you went to dye it, did you have to cover everything else up?

Thanks TOB3RT! After dyeing the black, I just peeled the vinyl where the green skin was, and did another hot dip. You can dye lighter colors right over the black without affecting it. After the green, I brushed the rest of the fill colors in, just like a coloring book. The only time I re-masked was for the background, and that was to the middle of the black outline.


How much practice do you have to have cutting by hand to do this?!

Although this was the first disc I ever dyed by cutting the mask by hand, I do have years of practice cutting masks with a #11 X-atco knife from my custom painting (motorcycles and helmets) days. All I can say is, just jump in and do it! Start with a simple design to gain confidence and a feel for what the blade is doing. Always keep a sharp blade and let IT do the work.

An aside, This being my first hand cut mask, I've always been skeptical about cutting the mask directly on the disc, for fear that it would scar the plastic or even worse, weaken or compromise it. I have to say that there is not one visible line from the blade on "Full Moon Feast".

Hope that answered your questions!

Peace,
-Jeff
 
This thread is great !:D

Funny thing is that I almost always take more pictures than I did of my submission, I only have one non-final picture.

Here's how I did it though:

Found the image on Google Images by searching for "Evil Face" (first picture)
Printed pics from google never seem crisp enough to use as stencils, so I generally print them and then redraw the lines in black. This time I just drew the pic. Then I made a cleaner version by tracing the first (second picture).

Then a dip dye with idye black for the black on the right side of the disc and the pupil.

Then weed off the blood and painted on idye crimson. Cut the viens in the white of the eye, flexed the disc to open them and painted on idye red. And weeded off the lighter areas on the right side and painted with a mix of idye blue, gun metal, and silver.

Then shaded those lighter ares with black to get a smoother transition. And weed off the Iris and paint on Pylam green.

Then put lines of idye blue on each side of the eye (on the vinyl), and with a toothpick, stroked the blue onto the Iris. Ive used that technique before and I really liked how it worked here.

Remasked and cut out the hand to avoid getting unwanted dye on the blood.

Colored the hand using a base skin color of idye red and water, applied at room temp with a qtip a few times (as discussed in that other thread). Used idye silver, gunmetal, black, brown, purple, red and crimson while coloring and shading the hand. At this point is where the third picture was taken.

Then it was one more remask, weed off the enire left side except the eye. Did the coloring and shading with the same colors as the hand, but on the face I got that textured look by again using a toothpick and putting a small amount of dye on and making streaks, being as random as possible with a brown and gunmetal mix, then again with just gunmetal.

Then weeded off the eye to do some final shading there (the reddish edge of the eye white, and the actual shading).

After that, just a couple touch ups and it was done.
 

Attachments

  • images.jpg
    images.jpg
    5.8 KB · Views: 37
  • 1030142004.jpg
    1030142004.jpg
    69.9 KB · Views: 42
  • IMG_20140929_225824779.jpg
    IMG_20140929_225824779.jpg
    73.2 KB · Views: 51
Last edited:
I ran out of time editing that post, but the outline of the face was done with the first black dip dye, and was all single cuts. If I had to guess I would say it probably took about 10 hours of work (not counting time dye was setting) from google image to final product.

Here's the final product again just for fun. Bad luck that these two posts are seperated by a page break. :(
 

Attachments

  • 1412737181472.jpg
    1412737181472.jpg
    52.7 KB · Views: 43
Last edited:
Fixed the page problem :D.

Messed up and did not quote the pics to move them over...duh...:doh:
 
Last edited:
Roggenb3,

Thanks for posting that! That's what I was hoping this thread would attract. Great to see how it all came together. Again, nice work! :thmbup:

Peace,
-Jeff
 
100 Acres of Halloween was actually going to be my submission to okthrowberfest last year. I rushed the dye trying to get it all done in one evening before the deadline and made too many mistakes. Ended up being extremely unhappy with the dye and not submitting it last year. I broke my collarbone about a month ago and was unable to lift my arm enough to do dye work. Bennett was nice enough to allow me to enter the dye for this years competition. Time has allowed me to appreciate the dye more than I did last year when I was in the middle of the process.

Tigger and Pooh is a coloring book image I found on google search. There are a couple more in there I considered as well. But this was my favorite image.

I weeded and dipped all the black. My first mistake was made here. You will notice a black line running down the left side of the disc. I cut the vinyl too short and put another piece of vinyl over the top. dye got under that piece and left a long bleed all the way up the side.

Weeded and dipped the red on pooh's shirt.

Weeded and dipped the orange on Tigger's face, the tigger costume, and the pumpkin.

Weeded and dipped pooh's face, the pooh costume and the inside of the pumpkin cuts. I believe this was a dip in rit tangerine. But I don't remember for sure. It might have just been a short orange dip.

The final dip was yellow and this is where the wheels came off the bus. Tiggers belly, ears, eyes, bottom of the foot, the honey, and the inside of the pumpkin were supposed to be yellow. Up to this point the coloring was all current tigger and pooh bright vivid reds and oranges. But I was rushing to get this done on time and also doing other things at the same time and I forgot to turn the heat off with the yellow. I ended up boiling the yellow with the disc in the dye. I felt like I had ruined the dye when I pulled the disc all of the color had been washed out and it was a faded dull color scheme. I was extremely disappointed and called it quits and let the deadline for okthrowberfest last year pass.

The next day I finished the tigger and pooh part by painting on the pink nose.

In order to "hide" the line on the left I decided to try some random paint squiggles and dots. That's the black lines and orange dots around the outside. I hated it. Ended up remasking tigger and pooh and putting the whole thing in a shaving cream bed. I still hate the black squiggles.

Time has given me more appreciation for the dye. I learned new things, and instead of the bright vivid colors of modern day pooh and tigger it has more of the faded time worn look of classic pooh. One day I may try the dye again and see if I can get the look I was shooting for.

Thanks to all the people who voted for my dye I am grateful for your support. Also thanks to Bennett for putting on such a great competition every year. Also great thread idea hurricane7.
 
Last edited:
Thanks for contributing, Eky8!:thmbup:

"100 Acres" is such a cool theme! I'm sure it put a smile on many faces, as it did mine. Interesting to read how it came together. Again, great work!:clap:

Bummer about the boiling part. That's one reason why I always get the dip nice and hot, then turn off the heat source before putting in the disc. If I need to re-heat, take the disc out and repeat. ;)

It's funny, to most people (even other entrants) looking at these dyes, they see nothing wrong with any of them... but as the artists that created them, there is almost always something we find wrong, or something we would do different. Well... OK... maybe not for a few of them. :D

Hope you heal up quickly!

Peace,
-Jeff
 
Best. Thread. Ever.

There he is!!! :D lol. Wondered where ya been?

Anyways not a whole lot to say about mine compared to some of these, other than it took a bit of tedious hand cutting. Could of been much worse though. I found the image on google images. I decided to shortcut some of the weeds and flowers in the image to preserve quality.

My steps were as follows:

1. Spent a good afternoon's worth of time cutting the main mask portion. I then cut out little tiny pieces of vinyl to mask off the pumpkins eyes and mouth areas as well as the owl and skulls in the tree area. Dip dyed black.

2. I then unmasked it all and remasked just the bottom portion under the base of the tree (to avoid the black from spreading its color when I spinned the rim). I then using my spin rig added dark orange/light red ring around the outside of the rim using a cotton pad and some of my detergent dye mix as well as some vinegar at times to help the dye dissolve a bit.

3. I then handpainted in the eyes and the with some bright red pylam mixed with a tad of idye. Let it sit for maybe 10-15 minutes, then rinsed. I then used a tooth pick to paint in the pupils for the owl and the pumpkins as well as detailing some of the teeth in the skulls in the trees.

That was pretty much the gist of this one. Here is a pic of it just before I dipped it.

inTheWorks_zpse05cb672.jpg


My 2nd entry, the venom one in the semi-finals was basically a combination of a handcut dip dye and splatter painting red dye all over my disc and my face in the process. lol :gross:
 
Last edited:
There he is!!! :D lol. Wondered where ya been?

Anyways not a whole lot to say about mine compared to some of these, other than it took a bit of tedious hand cutting. Could of been much worse though. I found the image on google images. I decided to shortcut some of the weeds and flowers in the image to preserve quality.

My steps were as follows:

1. Spent a good afternoon's worth of time cutting the main mask portion. I then cut out little tiny pieces of vinyl to mask off the pumpkins eyes and mouth areas as well as the owl and skulls in the tree area. Dip dyed black.

2. I then unmasked it all and remasked just the bottom portion under the base of the tree (to avoid the black from spreading its color when I spinned the rim). I then using my spin rig added dark orange/light red ring around the outside of the rim using a cotton pad and some of my detergent dye mix as well as some vinegar at times to help the dye dissolve a bit.

3. I then handpainted in the eyes and the with some bright red pylam mixed with a tad of idye. Let it sit for maybe 10-15 minutes, then rinsed. I then used a tooth pick to paint in the pupils for the owl and the pumpkins as well as detailing some of the teeth in the skulls in the trees.

That was pretty much the gist of this one. Here is a pic of it just before I dipped it.

inTheWorks_zpse05cb672.jpg


My 2nd entry, the venom one in the semi-finals was basically a combination of a handcut dip dye and splatter painting red dye all over my disc and my face in the process. lol :gross:

Nice work on both...:clap:...I voted for both of those entries!

I had no idea you did both of them. What discs were they done on?
 
Nice work on both...:clap:...I voted for both of those entries!

I had no idea you did both of them. What discs were they done on?

Thanks man :D Glad you liked them. Moonlight Madness was done on a light orange innova echo star teebird and venom was done on my buddy's white innova star coyote. He lucked out that I was too lazy to go buy my own disc for my 2nd entry, so I hooked him up with that pretty sweet venom dye.
 
Top