• Discover new ways to elevate your game with the updated DGCourseReview app!
    It's entirely free and enhanced with features shaped by user feedback to ensure your best experience on the course. (App Store or Google Play)

Homemade basket - The Pin Wheel

Awesome design man!!

I will be going to Lowes to get an umbrella light for my machlite today.

Thanks!

Once you get the light, you'll probably feel like posting in the The best money you ever spent thread. :hfive:

By the way, let us know how it works out on your Mach Lite. I'm sure there are a bunch of other Mach Lite owners here that would like to know of the results.
 
Thanks for this. And thanks for noting this on the quiet basket thread so I caught it! I have a real appreciation for so many aspects of what you put together and that you followed through to a great product! This has a great combination of creativity, aesthetic, and that it meets the pdga specs too! Awesome! This is a great contribution to our collective developing knowledge.
 
Making the hose chain

Someone had asked how the hose chain was assembled so here are the steps to make them.

WARNING: Please wear safety glasses when following these instructions.
  1. Tightly wrap (two or three passes are sufficient) electrical or masking tape at the very end of a 1/2" cotton rope. I prefer electrical tape myself. Duct tape would also work very well but you'll have to cut it into small strips. Also, you can use nylon rope but, in my opinion, cotton is far superior. It's heavier and hangs more naturally than nylon.
  2. Cut the hose in 1.5" sections. These are the "chain" links. How you cut the hose is up to you. I used a miter saw which made this step really quick and easy. For the outside ring of chains I used 19 links and for the inner ring I used 15. String up the links on the rope.
    Stringingthelinks.jpg
  3. Take a 1/2" lock washer and secure it in a vice so that about half of the washer is sticking up. Using a hack saw, cut through the portion of the lock washer that is sticking up. Be sure to cut it such that you're not cutting into one of the inner teeth of the washer. Once you've completed the cut, bend it ever so slightly so that the cut ends are not lined up.
    Cutlockwasher.jpg
  4. Remove the lock washer from the vice. Slip the cut lock washer over the taped end of the rope. Open the vice enough that the lock washer just fits in between the plates (perpendicular to the plates). Ensure the lock washer is in the middle of the taped section and then tighten the vice. Make sure the cut ends "pass" each other. Open the vice and rotate the rope/washer 90 degrees and tighten the vice again. Repeat this rotation until the lock washer has a nice grip on the taped rope. NOTE: Don't completely crush the lock washer such that it's smaller than the opening of the hose. You want it to have a secure grip on the taped rope while still being large enough to barely fit inside the open of the hose.
    Lockwasherpinch.jpg
  5. Slide the first link up to the deformed lock washer. Using the tip of some needle nose pliers, push/work the lock washer into the opening of the hose. This may prove to be difficult. It's actually a very good thing if it is difficult. This means it's going to be a very tight fit and the washer will have very little chance of sliding out the other end of the link. You actually want the washer to be slightly bigger around than the hose opening. Push the washer down until the very end of the rope is about 3/8" from the end of the link. NOTE: Try not to push too much on the actual rope end when forcing the washer into the link. Doing so may cause the rope to be pushed right out of the washer. If you're using a large pair of needle nose pliers, you can use the butt end of one of the handles to push against the end of the rope some but try to limit this as much as possible.
    Ropepusherdintohoselink.jpg
  6. About an 1/8" from the end of the first link, drill a small hole through the hose. I don't recall exactly what size bit I used but you want the hole to be a snug fit for a #4-40 1" crown bolt (in another thread I mistakenly said I used #8-32 1-1/4" crown bolts). Work the crown bolt into the first hole. Using a pair needle nose pliers, grasp the nut and hold it inside the hose and screw the bolt into it. Once you've gotten the bolt half way through the hose, slip a 1" S hook onto the bolt. With the S hook in place, finish screwing the bolt until the nut is tight against the inside of the hose wall. The end of the bolt should be sticking out of the other side of the hose. Cut this excess part of the bolt off with either a hacksaw or a dremel tool with a cutting wheel/disc. I should mention that before slipping the S hook into place, close the gap of the S hook using either the vice or a pair of pliers. The vice makes it a lot easier.
    BoltandShook.jpg
 
Making the hose chain (continued)

  1. ...
  2. ...
  3. ...
  4. ...
  5. ...
  6. ...
  7. Slide all of the links down against the link you just secured. You actually want them to be pressed against the first link while you wrap tape around the rope. Make this taped section about 1.5" - 2" long. Use scissors to cut the rope in the middle of this taped section.
    Cutend.jpg
  8. Go back to step 3 and repeat this process for this end of the rope. Once you've finished step 6 this second time, you'll have a completed section of hose chain.
 
genius. truly inspiring. thanks for posting- cant wait to jump on my own project..
 
awesome!!!

I was just doing some research online about building my own baskets and came across this thread. Well of course I had to register just to say how wicked cool this basket is and that I look forward to further exploring this site. Thanks for creating and sharing.:thmbup:
 
DiscChucker, did you ever post anything in regards to materials and process? That is, if you're willing to share, because quite frankly this looks B.A. and I especially love the quiet "chains". Would definitely like to build one of my own (or something close to it!)
 
I will definitly try to build one as well. An amazing basket you built there while thinking outside of the box! Where dis you get wheels from a wheel chair btw?
Thanks foe the idea.
 
I appreciate the compliments on my basket everyone.

DiscChucker, did you ever post anything in regards to materials and process? That is, if you're willing to share, because quite frankly this looks B.A. and I especially love the quiet "chains". Would definitely like to build one of my own (or something close to it!)

I haven't yet written up the material list or build process for this project. :( But my intention has always been to share this with people as I think there are some people out there who will appreciate the fun of the build, the unique aesthetic of the re-purposed materials and the awesomeness afforded by the quiet chains. Documenting the details of this basket is definitely on my to do list. Unfortunately, it always slips down the list due to higher priorities. I will get it done; hopefully sooner than later.

Ultimately, I want to post a video of the basket in action. Whenever people see it and throw at it they're instantly hooked. It's been a real hit at night time get togethers.
 
I saw your post a while back, and it inspired me to create one very similar.

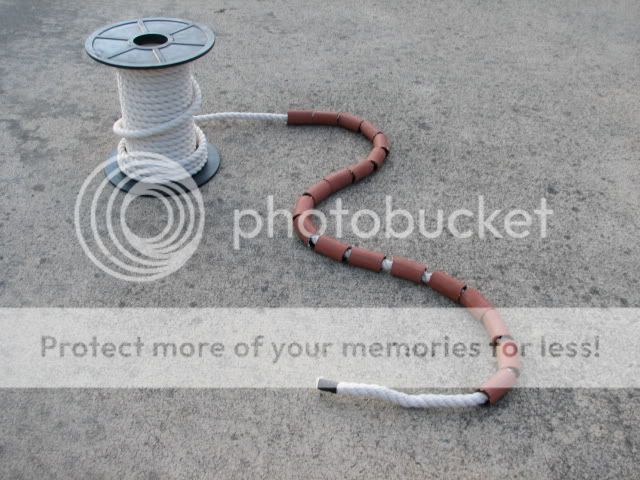
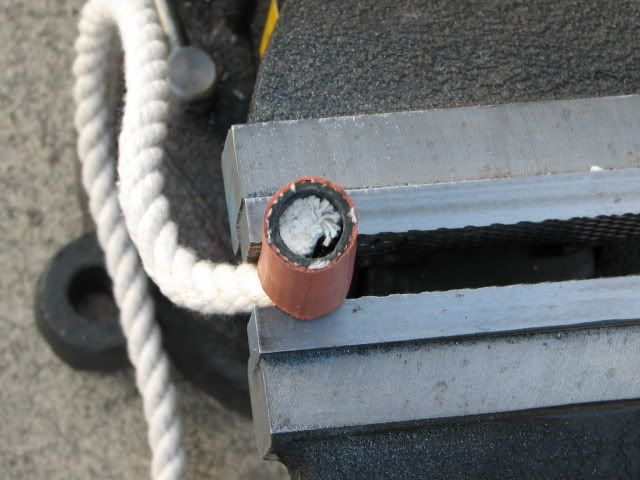
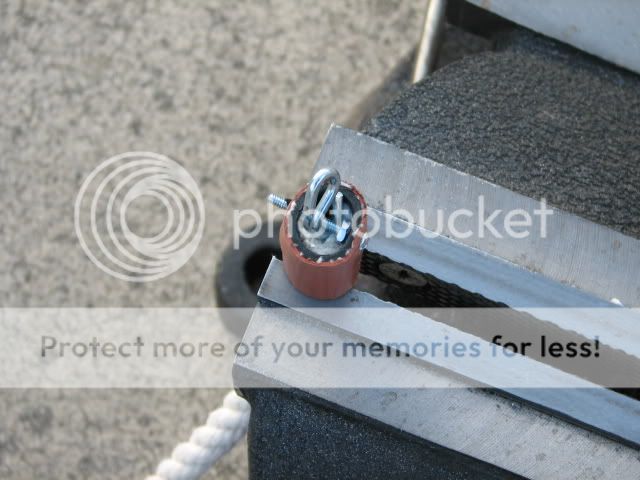
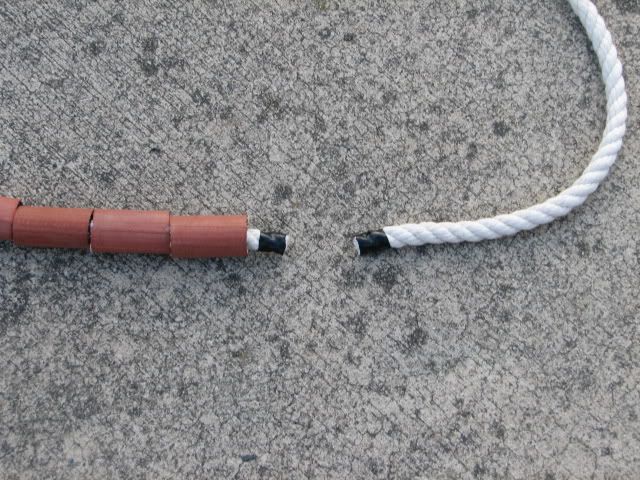
I love the quiet chains, and I also think it looks cool. I used some orange garden hose with a clear coat for my links that looks pretty slick with the black and white frame.

My base isn't very solid though. I found an umbrella stand at wal-mart made of plastic, but even with sand in it, it's too flimsy. Also, I find that the where the poles meet the basket and the deflector support aren't very solid. I've been tempted a few times to just put some PVC glue on them... but that ruins the portability.

I'm thinking of perhaps digging a hole and putting a PVC receiver in the ground, to give it some stability in my back yard.

Also, as a side note -- I originally mounted the 'chains' to the deflector support with wire-ties. This is not sturdy enough -- I had to replace wire-ties at least once per putting session.

I might have to post some pictures of my own after I get mine fixed up a little better.
 
Mine has similar hard edges around the PVC joints. The crosses and tees have a much larger diameter than the PVC piping, and the corners are fairly sharp. I used electrical tape to make a smoother transition -- This has helped, but isn't a good long term solution.

Really, though -- some of the courses I've played on have baskets with harder edges. I think with any basket, hitting the frame will wear on baseline plastics.

I throw Ions mostly, so this isn't as big of concern as the baskets stability.
 
I think the pin wheel would be PERFECT for catching a Gary Davis 'Wurldwin'
 
Your DIY Golf Basket Inspired Me!

Thanks DiscChucker for the great ideas. You inspired me to build my own basket. I used a 55 gallon drum for the basket and top, and used your rope and garden hose idea for the chains. It only cost me about $30 to put together and it catches like a champ, much better than the In-Step I purchased at Costco that is also in the picture. I've added inner chains since this picture and plan to add an umbrella light. Thanks again for sharing. I know this post is older, but it still was very inspring to me and I had to comment.
 

Attachments

  • DIY DIsc Golf Baskets.jpg
    DIY DIsc Golf Baskets.jpg
    92.7 KB · Views: 149
The time and effort you put into that basket is clear...GREAT JOB! PVC being so light, you don't have any problems with it tipping over or anything do you?
 
I've admired this basket design quite a bit from a distance for a while now, and now that I am the proud owner of a pair of wheelchair tires, I'm ready to take a stab at it myself. I just have a few questions of things I couldn't really see too well from the pictures.

The area where the basket attaches to the pole is the confusing area to me. First of all, what exactly is the black plastic circle? To me, it looks like maybe part of a hose reel? I'm sure pretty much anything circular would do the trick, but I was curious what you used. Also, are the spokes of the basket section attached to the center pole solely by this black plastic section? I can't imagine that there is a prefabricated PVC piece to go from the larger diameter center pole to as many smaller diameter spoke sections as exist on the basket. I was just planning on securing this section to a union in the middle and securing the spokes to the black plastic, but I wasn't sure if it would be sturdy enough.

Can't wait to try this out and to report back on how it turns out!
 
Top